Placing & Finishing
Now it’s time for placing and finishing the concrete driveway. Ready-mixed concrete should be delivered and discharged as quickly as possible. 1 to 1½ hours is usually a reasonable time frame. The following is the sequence for placing and finishing the new driveway.
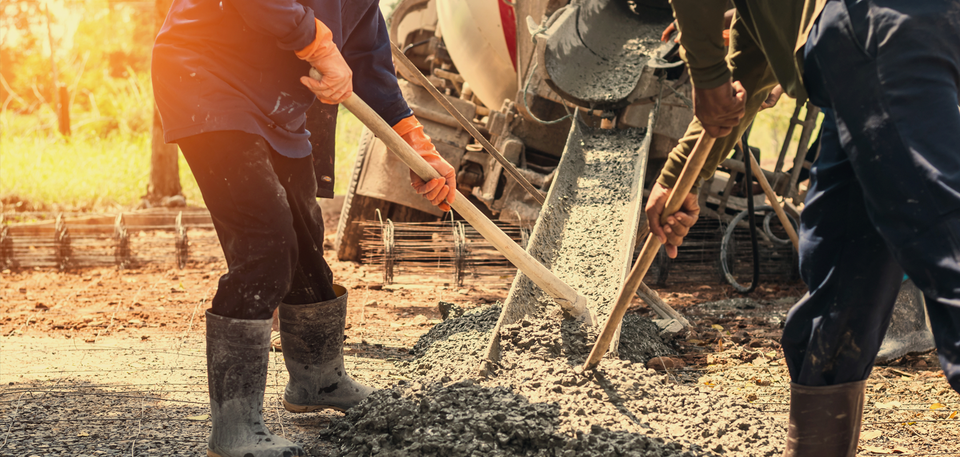
Spray or brush all forms with form oil, and moisten the subgrade with water. Do not over water. There should be no puddles or standing water on the subgrade before placing the concrete. The concrete should be placed as near as possible to its finished position…either chuted directly or into wheelbarrows and wheeled to its final location. Use of shovels is recommended to ensure complete filling along the sides of the forms.
Strike off the concrete with a straight piece of lumber to smooth the surface and bring the slab to its proper elevation. Check for any low spots. Another pass with the piece of lumber provides a uniform surface for the following finishing operations. Immediately after strike off, a bull float is worked back and forth across the surface to remove any irregularities. Don’t overwork, or the surface may be weakened. At this point, edges can be tooled into the concrete.
Surface bleed water must evaporate before proceeding with the final finishing. Properly specified concrete should allow finishing operations to begin almost immediately. A concrete broom is used for the final finish. Before brooming, the surface should be stiff enough to retain marks or grooves left by the bristles of the broom. A trowel finish is not recommended because it could leave the surface slippery and unsafe. The rougher broom finish improves traction. Snap chalk lines to indicate where joints go.
Concrete Slabs
Homeowners take great pride in the exterior of their home. The concrete driveway has become an essential part of a landscaping plan that imparts an inviting image. Concrete’s wide variety of texture, color, or patterns has elevated the driveway to the status of a landscape design element…meeting today’s homeowner’s exacting demands.
Not only is concrete functional, it lends itself to a wide variety of design options…which can make a dramatic difference in home landscaping plans, as well as enhance property values. In addition to the traditional look, concrete can have the decorative appearance, feel, and color of brick, tile, slate, or stone. Exposed aggregate is another popular finish. Also, many other design choices are available. All of these choices complement a variety of exterior treatments of the house.
From the street to the garage, a personally designed concrete driveway not only adds visual satisfaction…but also adds long-lasting quality and value to your home as well.
Planning
The quality of the completed concrete driveway always begins with good planning. Spending time at this stage is always a wise decision that can help to eliminate possible problems later on. One of the first things to consider is size.
The suggested width for a single-car driveway is 8 to 9 feet. For double width, plan to use 15 to 18 feet. If the distance from the street to a two or more car garage is long enough, the initial entry approach can be of a single-car width and then widened near the garage to accommodate all car stalls. If space is available, extra parking or a turn-around area can be included. Also, the planning stage is the time to consider adding that concrete patio or porch addition.
As for thickness, non-reinforced pavement 4 inches thick is standard for passenger car driveways. For heavier vehicles, a thickness of 5 inches is recommended. To eliminate standing water, the driveway should be sloped towards the street a minimum of 1%, or 1/8 inch per foot for proper drainage.
Many Design Options
Today’s concrete can be formed into practically any shape, texture, pattern, or color. It’s a way of adding a new dimension of quality and elegance to your home, at a reasonable cost.
Pattern stamping is an exotic and colorful way to enhance ordinary concrete paving. Essentially, the driveway is cast-in-place concrete which has been colored and imprinted with a pattern designed to look like brick, tile, cobblestone, or other various patterns. Textured finishes include bromide, swirl, or exposed aggregate.
Site Preparation
When the basic driveway design has been decided, the next step is site preparation. As an example, let’s assume that an existing asphalt driveway is being replaced with a traditional, broom-textured concrete driveway. In brief, this is how a typical site preparation works.
The existing thin layer of asphalt is easily removed with a fork-lift truck (or by any method) and carted away. The existing gravel base is reusable…but since the new concrete driveway will be thicker, some of the gravel must be removed to maintain proper elevation.
The gravel base is compacted with a vibratory plate compactor. For a new driveway, a gravel subbase is not needed, but the subgrade must be compacted in a similar manner.
Lumber side forms should be placed and securely nailed to stakes in the ground. These stakes should be no more than 4 feet apart and should support each joint in the forming lumber. Measure for elevation and double check the base to ensure uniform slab thickness.
Match the new driveway level with the existing garage slab and sidewalk. An isolation joint is needed where the drive is to meet these existing pavements. Typically ¼" to ½" thick pre-molded joint material is used to make this joint.
Curing
Curing is one of the most important and also the most often neglected phase of good concrete construction. Poorly cured concrete is more likely to crack and will not be as durable.
Curing should last for a least 3 days, and as long as 7 days, if practical. There are several methods of curing, including plastic sheets to cover the concrete, or continuous sprinkling, or applying a special curing compound. Curing should begin as soon as possible after the finishing operations. In areas experiencing colder temperatures, curing procedures may need to be adjusted.
Jointing
Joints in concrete pavements control the location and spread of cracks. They can be hand-tooled or saw cut, and should be made to a depth of no less than 1 inch for a four-inch-thick slab. Joints should be spaced no more than 10 feet apart for a 4-inch slab. Driveways that are wider, 12 feet or more, also require a joint down the center. Panels should be as square as possible, but in no case, should the long side be more than 1½ times longer than the shorter side. Jointing should begin as soon as possible after the finishing operations. If jointing is to be done with a hand groover, proceed when the concrete sustains foot pressure with only a ¼ inch indentation. If sawed, begin within 24 hours.
The Bottom Line is Quality
When all is said and done, the quality of a completed concrete driveway is dependent upon the workmanship of the paving contractor plus the quality of the concrete used in the project. Concrete driveways are constructed using ready-mixed concrete, high-quality aggregates, and water.
Because here at A-Z Roofing & Contracting, LLC, we specialize in exterior home improvements, concrete projects are an essential part of our business. Thus, we provide a full range of concrete services to customers in TN and AL. If you need us to take a look at your project, just give A-Z Roofing & Contracting a call at (256) 828-2882